Upgrading ESXi to 5.5 and 6.0 Using a Bootable USB drive and macOS
I’m not a VMWare expert so when it came time to upgrade my personal free ESXi host it took me a long time to figure it out. I didn’t have any fancy tools or paid licenses to assist which meant it had to be done through a bootable USB drive. I had a really hard time figuring out what to do and then creating a bootable ESXi installation USB and wanted to document this for anyone else struggling.
Download ESXi
Even if you’re doing an upgrade, you need to download the following:
ESXi ISO image (Includes VMware Tools)
https://my.vmware.com/en/web/vmware/evalcenter?p=free-esxi
This is a free download from VMWare and on the same page is where your free license key is. Save that since you’ll need it after the upgrade. It changes with each upgrade.
Format the USB drive
First determine which /dev/driveN your USB drive is plugged in to. You can simply do an ls /dev/disk* before and then again after you plug in the USB drive.
Next, you can format the drive using Disk Utility application that comes with macOS. When you format it, make sure to set the file system to FAT, and if you have the option, write it to the master boot record.
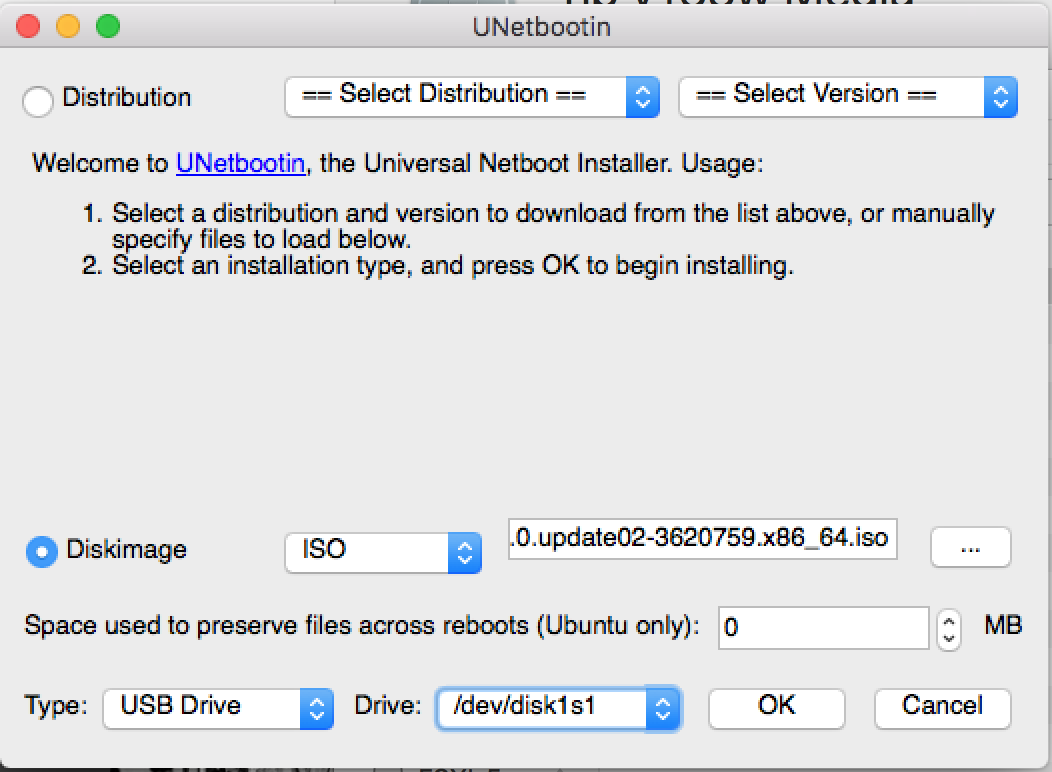
Create a Bootable USB
For some reason this part tripped me up a lot. Using a Mac running OSX I was able to get this done using UNetbootin.
Download UNetbootin
Choose the ISO Image and USB drive
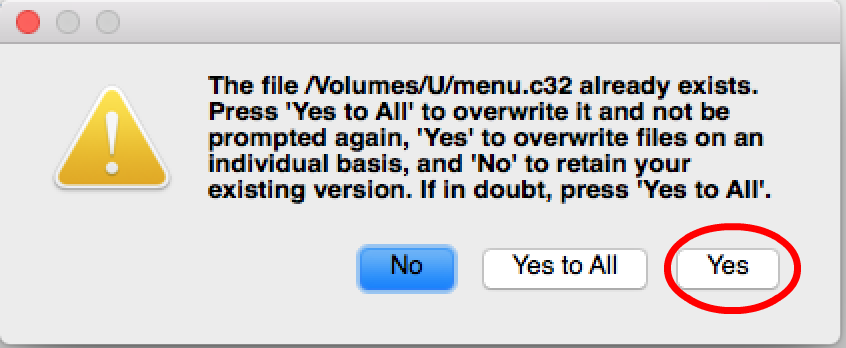
Overwrite menu.c32
Make sure to choose yes on this option.
Now Upgrade!
Power down the ESXi host entirely, plug in a monitor and keyboard, and boot to the USB drive you just made. You’ll have the option to install fresh or upgrade an existing ESXi installation.
The rest of this process is described in this video. Even though it is a video for 5.5 it is exactly the same for 6.0.
https://www.youtube.com/watch?v=og6PeyXPQ8A